Create & Style: 21 DIY Plant Stands to Upgrade Your Indoor Plants Decor
Disclosure : This post may contain affiliate links or paid partnerships. I may earn compensation if you click a link or make a purchase, at no additional cost to you. See my disclosure for more info.
You bought the plants.
The beautiful fiddle leaf fig. The trailing pothos. The cute little succulent trio from the farmers’ market.
You were excited.
You watched all those reels. You pinned all those gorgeous living rooms with perfect green corners that look like something out of a magazine.
And then reality hit.
Your plants are sitting on the floor. Lined up against the wall like awkward teenagers at a school dance.
Or they’re crammed on your windowsill. Competing for space with a candle, a coffee mug, and last week’s mail.
Maybe you shoved one on top of a stack of books. Looked decent for about three days. Until you watered it and the water dripped down and ruined the covers.
Great.
You thought about buying a nice plant stand. Something stylish. Something that would make your living room look intentional.
Then you checked the prices.
Fifty dollars. Seventy dollars. Ninety dollars for a plant stand.
For a piece of wood with legs.
You closed the browser tab and moved on with your life.
Your plants stayed on the floor.
Your room stayed… fine.
Not inspiring. Not cozy. Not “wow.” Just fine.
Here’s the thing though.
It doesn’t have to stay that way.
You don’t need a designer’s budget. You don’t need a workshop full of power tools. You don’t even need to be “handy.”
What you need is one good idea and a free afternoon.
That’s what this article gives you.
Twenty-one DIY plant stand ideas that genuinely look good. That you can actually build. That will change the way your space feels the second you finish them.
Some take thirty minutes. Some take an hour. None require an engineering degree.
Ready?
Let’s go.
1. The Thrift Store Stool Makeover
Walk into any thrift store.
Find a small wooden stool. The older and weirder, the better.
Sand it down. Hit it with a coat of paint — matte white, sage green, terracotta, whatever speaks to you.
Place your plant on top.
That’s it.
You just built a plant stand with more personality than anything at IKEA. For probably four dollars.
The trick? Don’t try to make it look perfect. The slight imperfections are what give it charm.
2. The Copper Pipe Tripod
This one looks like you spent serious money.
You didn’t.
Three copper pipes. Three elbow connectors. One round wooden disc for the top.
Assemble the pipes into a tripod shape. Glue the disc on top. Done in twenty minutes.
The warm copper tone next to a green plant is one of those combinations that just works. Every single time. It’s basically interior design on autopilot.
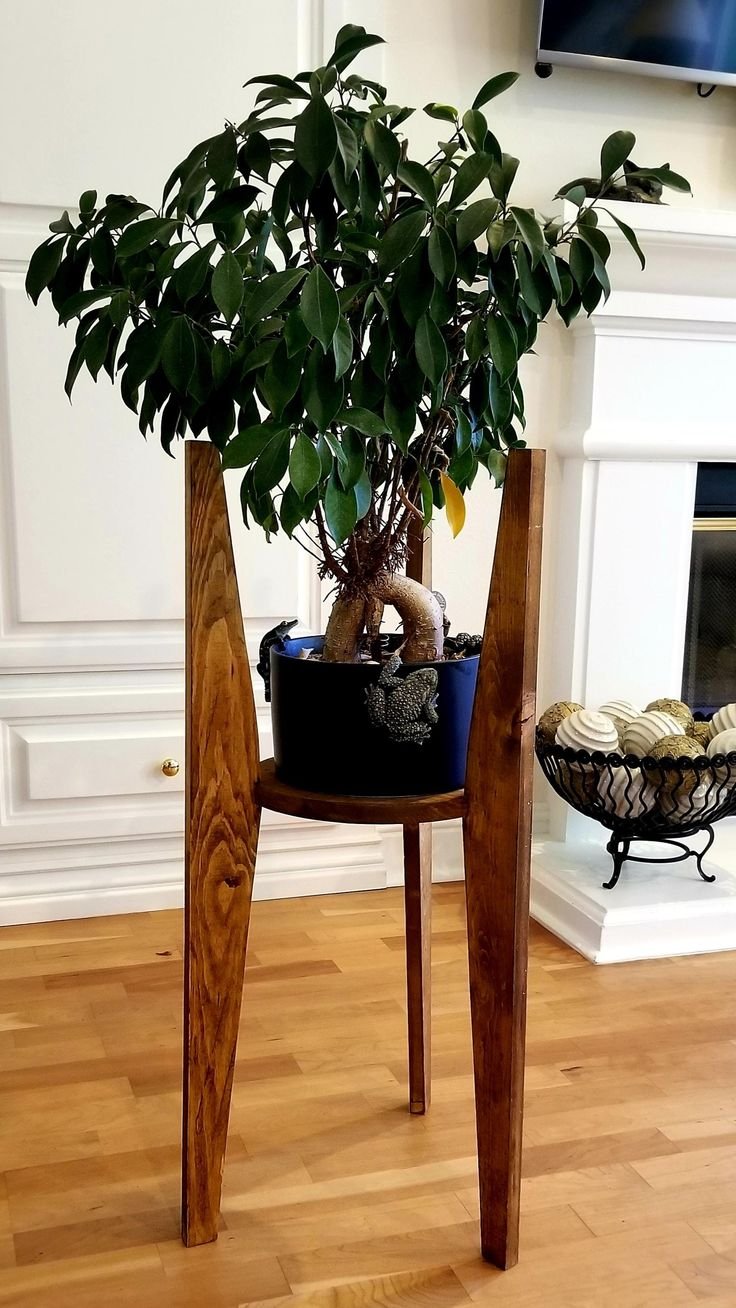
3. The Mid-Century Hairpin Leg Stand
Hairpin legs are dirt cheap online.
Buy a set of four. Screw them into a round piece of wood. Boom — you’ve got a mid-century modern plant stand that would retail for sixty bucks at West Elm.
You made it for under fifteen.
Want to go the extra mile? Stain the wood a warm walnut tone. The contrast between the dark wood and shiny metal legs is absolutely gorgeous.
4. The Stacked Crate Vertical Shelf
Grab two or three old wooden crates.
Stack them vertically. Alternate the open sides so they face different directions.
Each crate becomes its own little plant niche. You get a multi-level display that adds height and depth to any corner.
Paint them all one color for a clean look. Or leave them raw for that farmhouse vibe. Either way, it works.
5. The Hanging Macramé Plant Holder
Macramé came back. And honestly? It earned its spot.
A basic plant hanger takes one hour and some cotton cord.
YouTube has about ten thousand tutorials. Pick one. Follow along.
When you’re done, you’ve got a floating plant display that frees up floor space and makes any room feel boho-chic without even trying.
Perfect for small apartments where every square foot matters.
6. The Cinder Block Pedestal
This one sounds almost too basic. Stay with me.
Buy one cinder block. Paint it matte black. Set your plant on top.
That’s the whole project.
But the visual contrast — rough industrial concrete under a soft, lush plant — is the kind of tension that designers deliberately create.
You just did it for about two dollars.
7. The Leaning Ladder Display
An old wooden ladder against a wall turns into a vertical plant gallery instantly.
Every rung holds a different pot. You get height variation, visual rhythm, and zero floor space wasted.
Don’t have an old ladder lying around? Build one. Two long boards. A few wooden dowels. Some screws. An hour of your time.
It looks incredible next to a sofa or in a hallway that has nothing going on.
8. The Upside-Down Tomato Cage
Flip a wire tomato cage upside down.
Spray paint it gold. Or matte black. Or copper.
Set a pot on the flat top.
The wire frame creates this airy, almost sculptural silhouette underneath. It’s unexpected. It’s clever. Guests will notice it.
And it cost you essentially nothing.
9. The Rope-Wrapped Tin Can
You have tin cans in your recycling bin right now.
Grab one. Wrap thick jute rope around it from bottom to top, securing with hot glue as you go.
What was trash fifteen minutes ago is now a textured boho planter that looks completely intentional.
Make three different sizes. Group them together. Watch people assume you bought them at Anthropologie.
10. The Floating Wall Shelf Spotlight
One single floating shelf. Mounted at eye level. One beautiful plant sitting on it.
Nothing else.
That’s not minimalism for the sake of minimalism. That’s making a statement.
The wall becomes your canvas. The plant becomes your art. This works brilliantly in bathrooms where counter space is precious, or in kitchens where you want life without clutter.
11. The Tree Stump Slice Platform
If you can find a thick cross-section of a tree trunk, you’ve struck gold.
Sand the top smooth. Leave the bark on the edges. Seal it with a clear coat.
Every single one is unique. The grain pattern, the color, the shape — no two are alike.
Set a plant on top and you’ve got the most organic, grounded display in the room. It connects your indoor space to the outdoors in a way nothing else can.
12. The Pegboard Plant Wall
Mount a pegboard on your wall. Add hooks and small shelves wherever you want them.
The magic here is total flexibility.
Move things around whenever you feel like it. Add more plants next month. Rearrange the whole layout in ten minutes.
It’s a living display system that grows with you. Literally.
13. The Broken Chair Conversion
That old chair in the garage with the wobbly leg?
Stop trying to fix it.
Remove the seat panel. Set a pot in the opening. Let a trailing plant cascade down the legs.
It becomes a conversation piece that looks like it belongs in an artsy café.
This is the magic of repurposing. You didn’t just save a chair from the landfill. You turned a problem into the most interesting thing in your room.
14. The PVC Pipe Sculptural Cluster
Cut PVC pipes into three or five different heights.
Glue round wooden discs on top of each one. Paint everything one unified color.
Group them together.
You now have a modern sculptural plant display that looks like it came from a design museum.
The key? Vary the heights intentionally. Short, tall, medium, tallest, short. That rhythm is what makes it look professional.
15. The Geometric Wire Frame Stand
Get some thick gauge wire. Bend it into a geometric shape — a cube, a hexagon, a triangle.
Place your pot inside.
The negative space around the plant makes it visually pop. The geometric frame acts like a picture frame for your greenery.
This takes patience and a pair of pliers. But when it’s done, it looks like a forty-dollar Etsy purchase.
16. The Window Box Indoor Shelf
Install a narrow shelf right across the inside of your window frame.
Line it with small pots.
Your plants get maximum natural light. Your window becomes a living art installation. And you didn’t sacrifice a single inch of floor or counter space.
Herbs work brilliantly here. You get décor and fresh basil. That’s what we call a double win.
17. The Rolling Utility Cart Garden
Those small three-tier utility carts on wheels?
They’re not just for kitchens anymore.
Load one up with plants. Roll it toward the sunny window in the morning. Roll it back in the evening.
A mobile garden that follows the light.
It’s practical. It’s charming. And it solves that eternal problem of “this plant needs more sun but there’s nowhere to put it near the window.”
18. The Wooden Box Shadow Mount
Build a simple open-faced wooden box. Mount it on the wall.
Slide a potted succulent or air plant inside.
It creates a shadow box effect — the frame draws your eye directly to the plant. Like a gallery piece.
Mount three in a row, spaced evenly. That’s not DIY. That’s an installation.
19. The Basket-on-Stool Layered Look
Take a woven basket. Put your pot inside it. Set the basket on a low wooden stool.
Three layers: stool, basket, plant.
This layered approach creates visual depth that a pot sitting alone on the floor simply can’t achieve.
It looks curated. Intentional. Like you actually thought about it.
Because you did.
20. The Tiered Hanging Fruit Basket Planter
Those three-tier wire hanging baskets meant for fruit?
Fill them with small plants instead.
Hang near a window. Each tier holds a different variety. You’ve created a vertical garden that occupies zero floor space, zero counter space, zero shelf space.
It only uses ceiling space. And you weren’t using that anyway.
21. The Intentional Stacked Book Pedestal
Yes, books as a plant stand. But this time, do it right.
Choose hardcovers with matching spine colors. Stack them evenly and deliberately. Place a saucer on top to protect from water damage.
This works beautifully in a home office or reading nook. It connects two passions — plants and knowledge — into one deliberate display.
The difference between “lazy” and “chic” here is intention. When it looks accidental, it looks messy. When it looks deliberate, it looks designed.
The One Rule That Makes Everything Look Expensive
You can build the most creative plant stand in the world.
And still have it look completely wrong.
How?
Bad proportion.
A tiny succulent sitting on a massive pedestal looks lost. Like a kid drowning in dad’s suit jacket.
A huge monstera perched on a tiny flimsy table looks like a disaster waiting to happen.
Match the scale of your plant to the scale of your stand. Big plant, sturdy substantial stand. Small plant, delicate minimal stand.
This one rule is the difference between “cute DIY project” and “wait — you made that?”
The Mistake That Keeps Your Room Looking Boring
You’ve scrolled through this entire list.
Some ideas grabbed you immediately. Others didn’t. That’s fine. That’s how it should be.
But here’s the trap.
You bookmark everything and build nothing.
You save this article. You pin some images. You tell yourself you’ll do it “when you have time.” Or “when you move into a bigger place.” Or “when you finish painting the living room.”
And six months from now, your plants are still sitting on the floor.
Still looking awkward.
Still making your room feel unfinished.
Don’t do that.
Now Do This
Pick one idea from this list.
Just one.
The one that made you think “oh, I could actually do that.”
Go get the materials this weekend. Dedicate one hour. Build it.
Put your plant on it.
Step back and look.
Your room will feel different. Not because you spent a fortune. Not because you hired a decorator. But because you made something with your own hands and placed it with intention.
That’s the difference between a space that feels like a waiting room and a space that feels like yours.
Your plants have been patient.
Your room has been patient.
Enough waiting.
Go build something.